
4 months ago


A few months ago, as part of the continuous progress of the Orbs Network’s governance, the Orbs community passed OIP-6.
As background, the Orbs ecosystem has expanded over the past few years, with integrations across the world of DeFi. An important part of this expansion was the bridging of the ORBS tokens from its original home on Ethereum to other chains.
For several of these new chains – specifically, BNB Chain, Avalanche and Fantom - the bridge was provided by the Multichain project. However, Multichain ultimately ceased operations and the bridges are no longer reliable. In response to this, new bridges to these chains, provided by Axelar were opened.
OIP-6 approved the development of a mechanism to allow holders of the old Multichain-bridged ORBS tokens to exchange their tokens for the new, updated version of the ORBS tokens bridged on Axelar on a 1:1 basis. The team is excited to announce that development of this mechanism has been completed and launched.
The mechanism, “ORBS Migrator”, is a smart contract deployed to each of the affected chains, that allows holders of a bridged Multichain token to exchange them for the new, updated version of the ORBS Token on a 1:1 basis. As approved by OIP-6, the smart contract has been loaded with ORBS tokens removed from the Orbs Long-Term Reserve Pool and bridged to the applicable chain. Anyone holding Multichain-bridged ORBS tokens on BNB Chain, Avalanche and Fantom can now send those tokens to the smart contract and receive a corresponding amount of Axelar-bridged ORBS tokens to the same sending wallet.
ORBS Migrator will be open for all holders until December 31, 2024. A short tutorial on how to use ORBS Migrator is below.
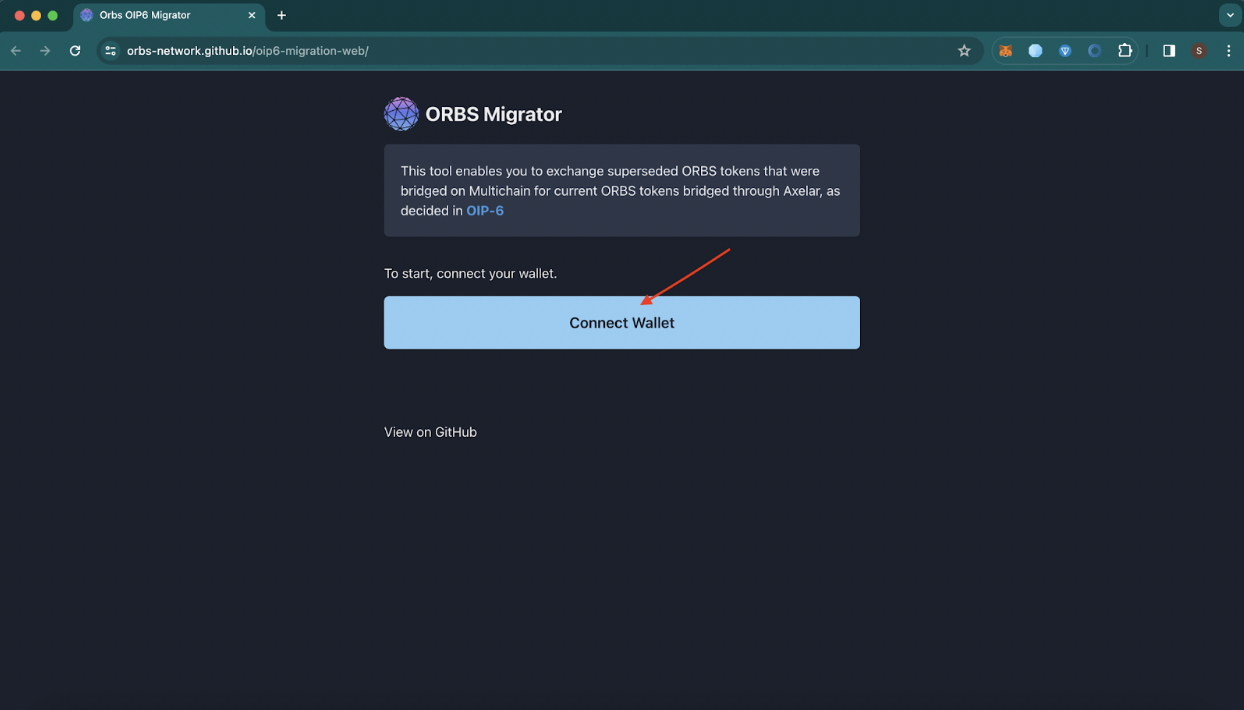
To begin, navigate to https://orbs-network.github.io/oip6-migration-web/, which is the migration UI for OIP-6. When interacting with any smart contract from a UI ALWAYS confirm that the URL is correct to avoid phishing attacks. For the tech-savvy, you can also click “View on GitHub” to verify the code you’re interacting with.
We will go ahead and click on “Connect Wallet”
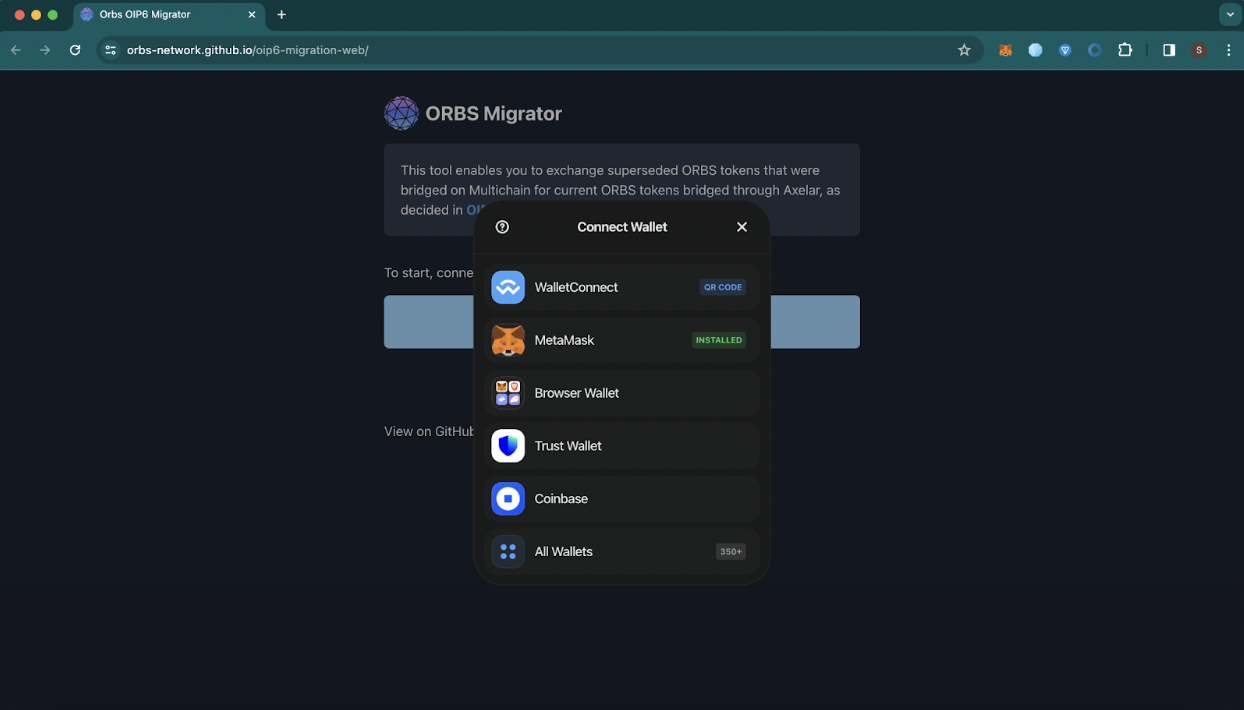
Clicking on Connect Wallet brings up all of the available wallet connections. In this case, we’re using MetaMask, but the process should be more or less the same regardless of which provider you’re using.
Upon connecting, you’ll be presented with the following screen:
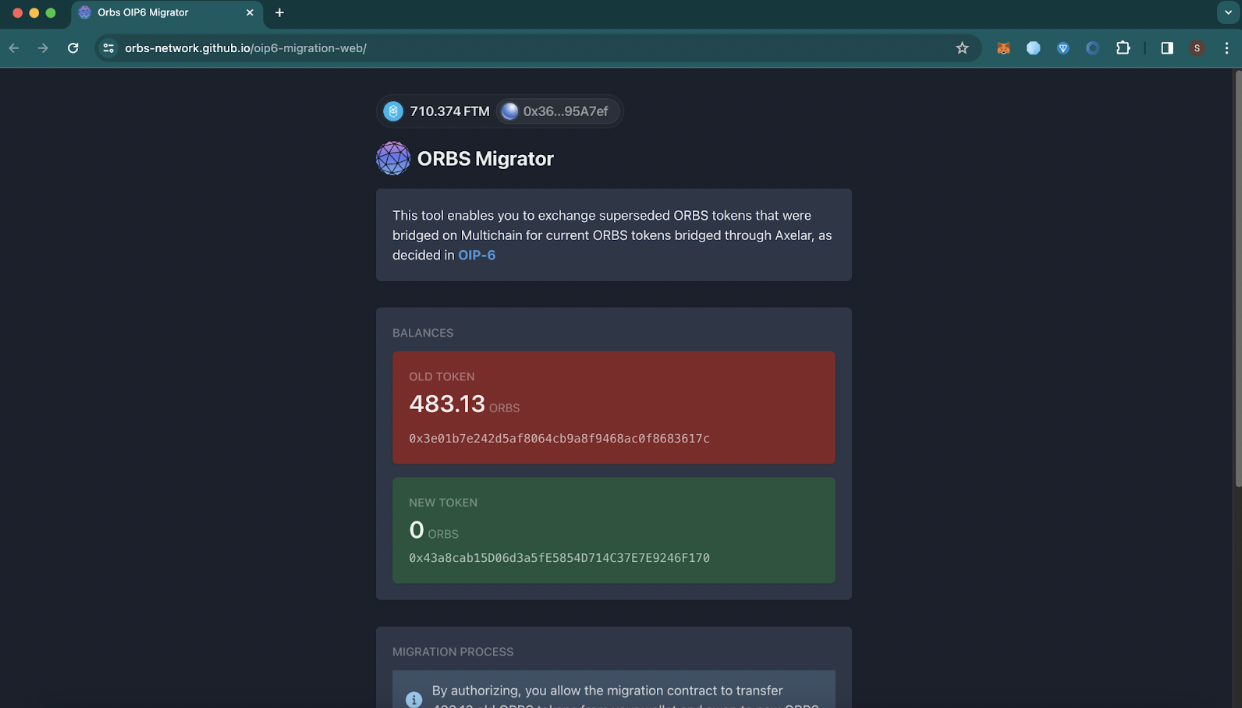
Here we see our “OLD TOKEN” and “NEW TOKEN” balances. Old being the multichain Orbs, and Green being the new contracts from Axelar. If for whatever reason you don’t wish to migrate your entire balance, you can select “Change Amount” and manually enter how many ORBS to migrate.
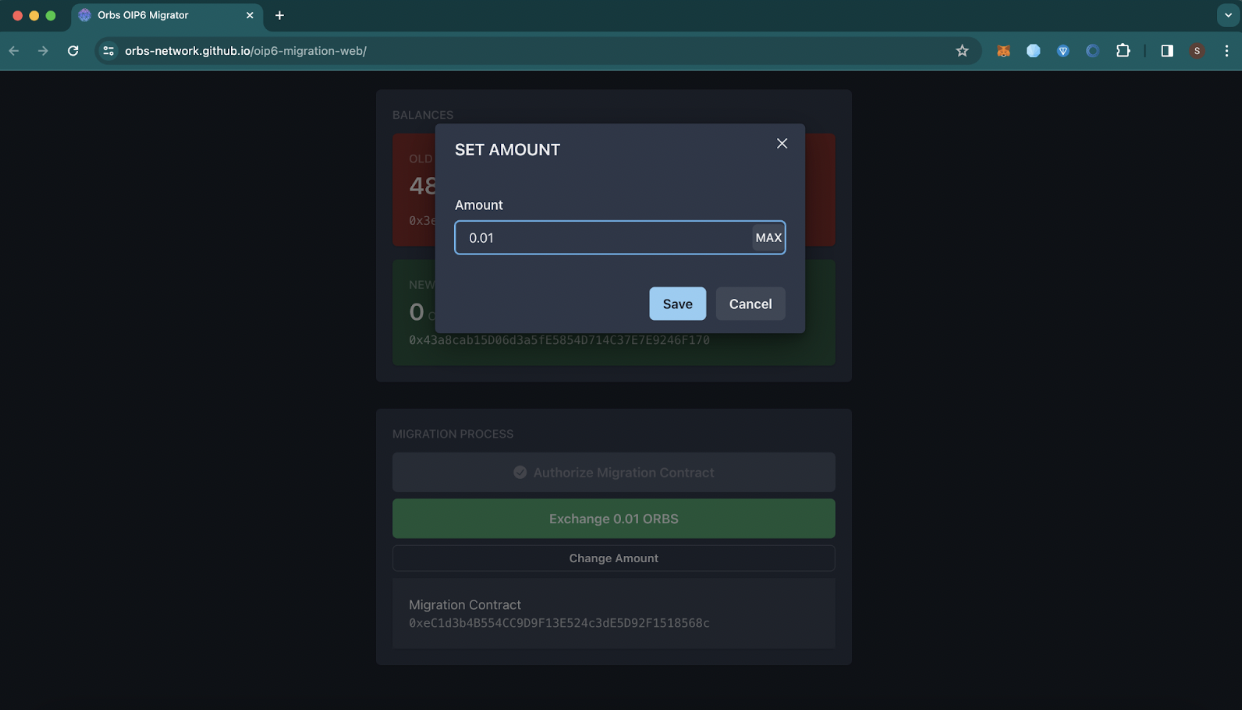
Since this is a tutorial, we will be clicking on change amount and setting the balance to 0.01 ORBS, if you don’t wish to change the amount, skip ahead now.
Simply click on “Change Amount” which will open a box where you can manually set the amount of ORBS you wish to migrate.
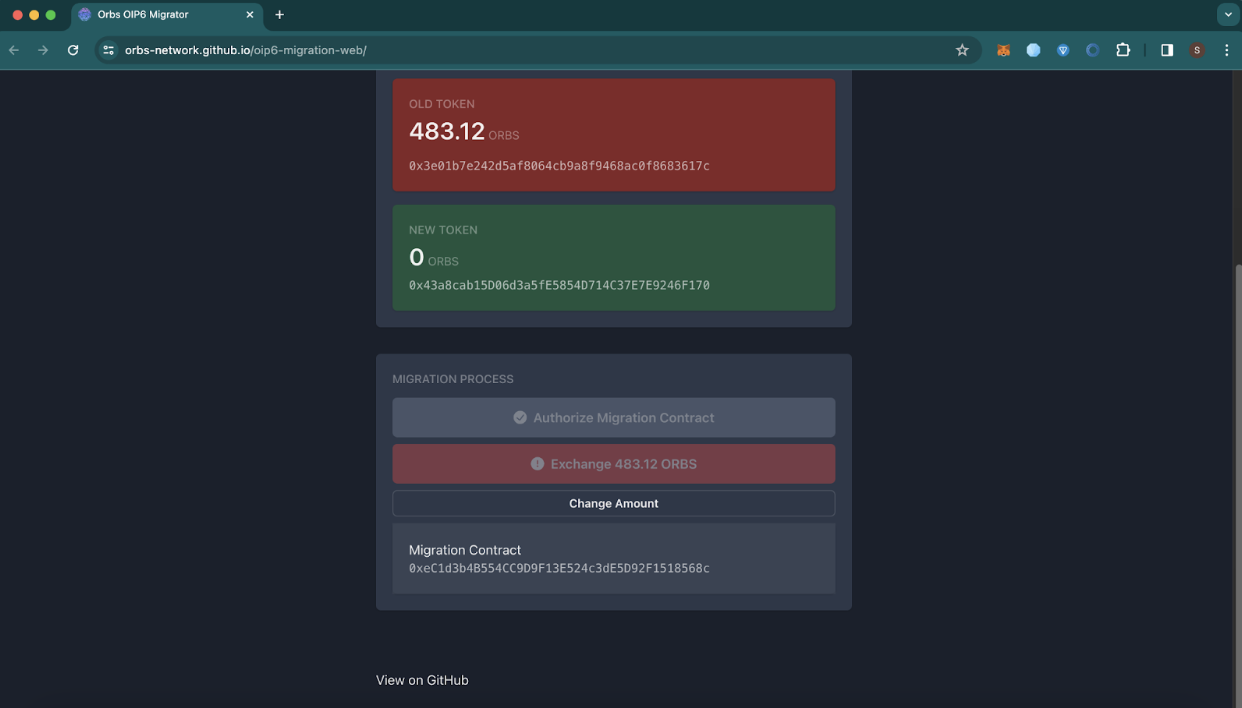
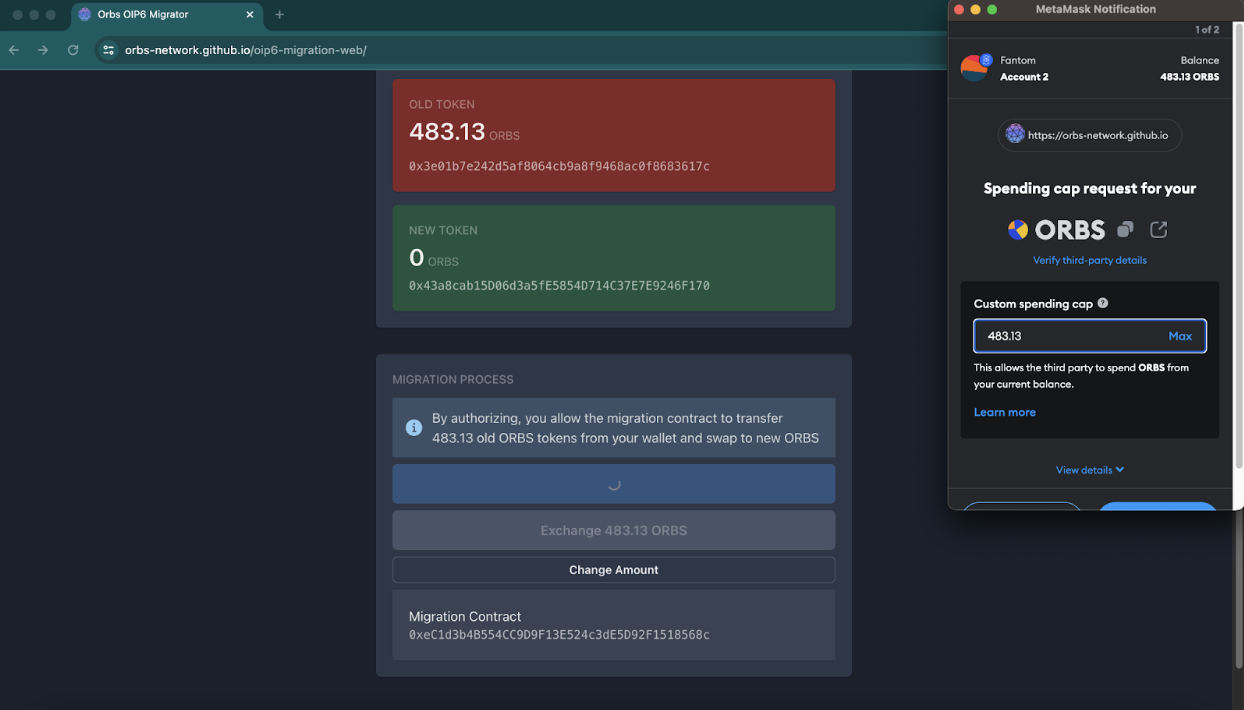
Next, we will need to approve our spending cap, to do this click on the blue button “Authorize Migration Contract” which will be bring up the following wallet popup in MetaMask.
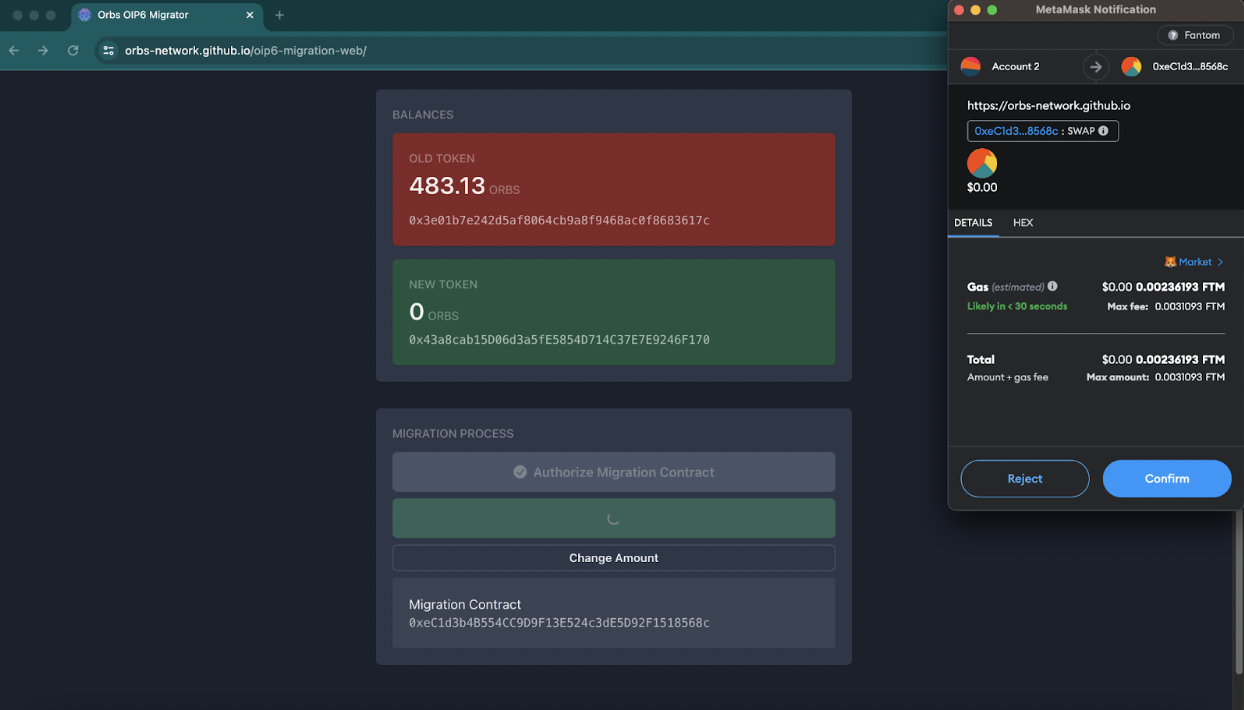
Once complete, we can then go ahead and migrate our 0.01 old Orbs by clicking on the “Exchange X.YZ ORBS” green button.
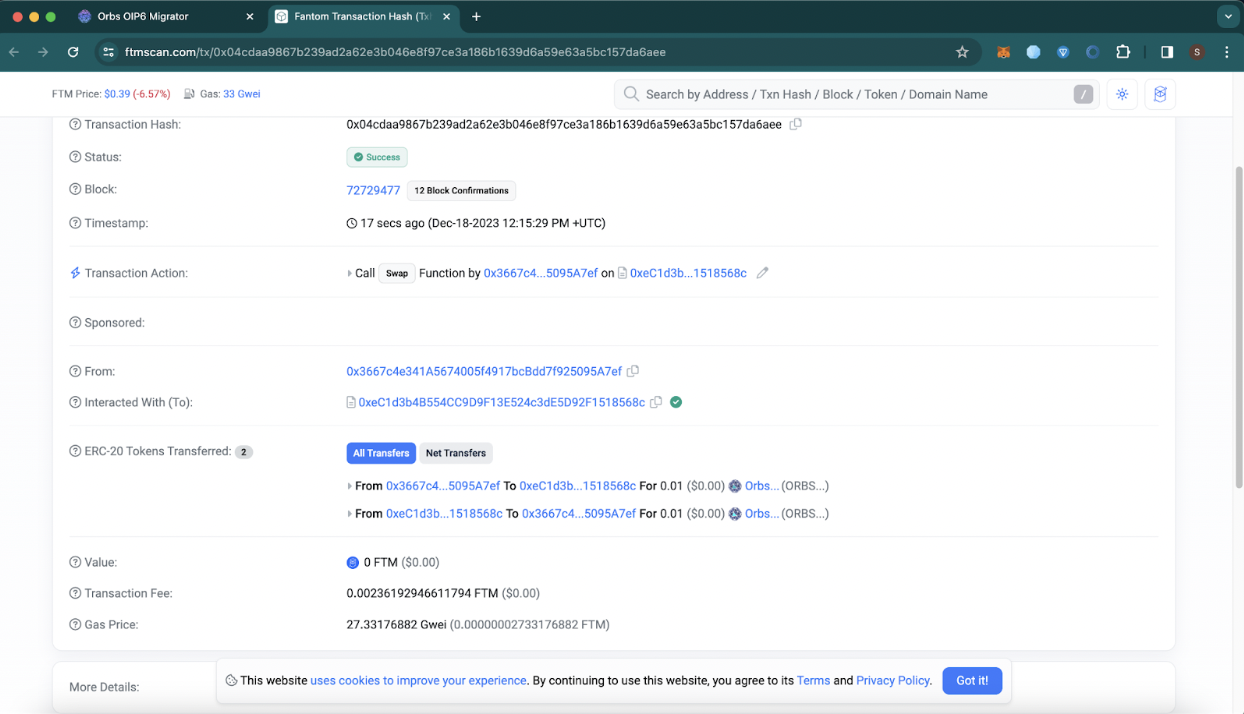
Once the transaction is confirmed on the network that’s it. You’ve successfully swapped your old ORBS for the “new” ORBS. Let us verify on FTM Scan that there were no issues.
We use cookies to ensure that we give you the best experience on our website. By continuing to use our site, you accept our cookie policy.


