7 years ago


In the previous post, we’ve discussed how to write and deploy a smart contract on the Orbs Network. This part will be devoted to writing a front-end application, and interaction with the contract via orbs-client-sdk in JavaScript.
···
For a quick and easy start-up, we will use React and the create-react-app to generate a new application.
Our application will contain only 3 components:
</textarea> for composing a new message.We would also need orbs-client-sdk to communicate with Orbs. It’s an SDK that provides basic functionality like creating an account, querying and sending transactions, etc. For more documentation check out this repo.
We install it via npm: npm install orbs-client-sdk.
Every chat application requires a user to post any message. We also need an account in order to communicate with the contract. For the purpose of our application, we will create an account per user in case one doesn’t exist yet.
Orbs-client-sdk has a method for that:
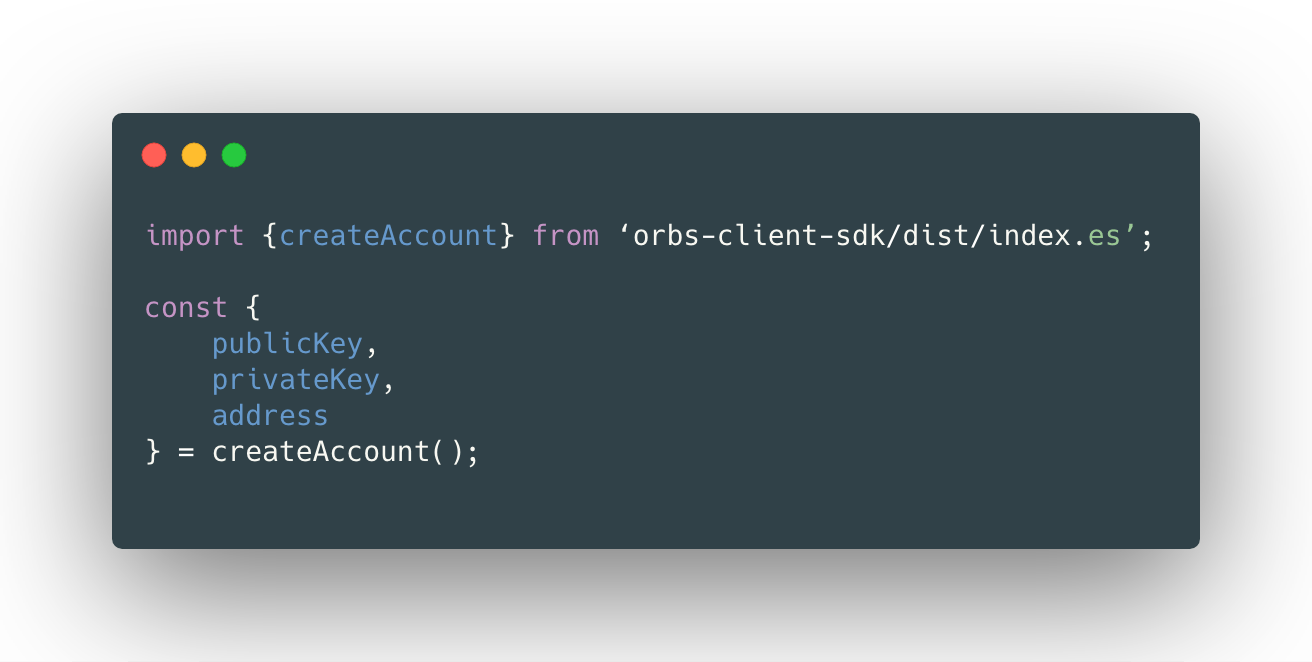
Sender is an object with 3 fields: publicKey, privateKey and address. These fields uniquely identify our user. In order to avoid the generation of a new account every time the user enters the app, we will store it in the localStorage. Important! Storing privateKey in the localStorage is for demonstration purposes ONLY. Do not do this in the production environment.
Besides the user account, we need an instance object of orbs-client-sdk for our app to function.
We can create it by calling a constructor function:
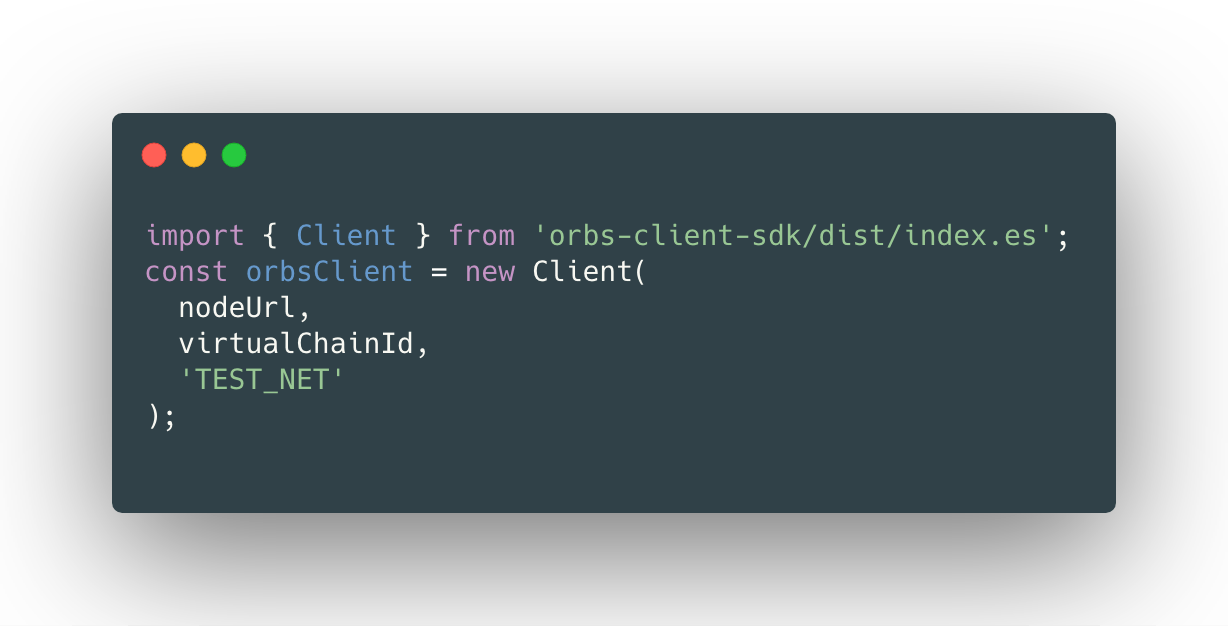
The constructor of the client receives 3 parameters:
TEST_NET or MAIN_NET’We will use this instance in the future for querying node and sending transaction.
Now, when we have an account, we can start adding messages. Fetching first won’t show us anything, so we’ll need to add some:
MessageInput component renders a simple TextArea with the submit button. It gets a prop “onSend”, but its logic is implemented in the app. Then a user hits the Submit button or Enter, the callback is invoked passing the message as a parameter.
The more interesting part is sending a message to the contract. Let’s take a look.
Firstly, we need to create a transaction:
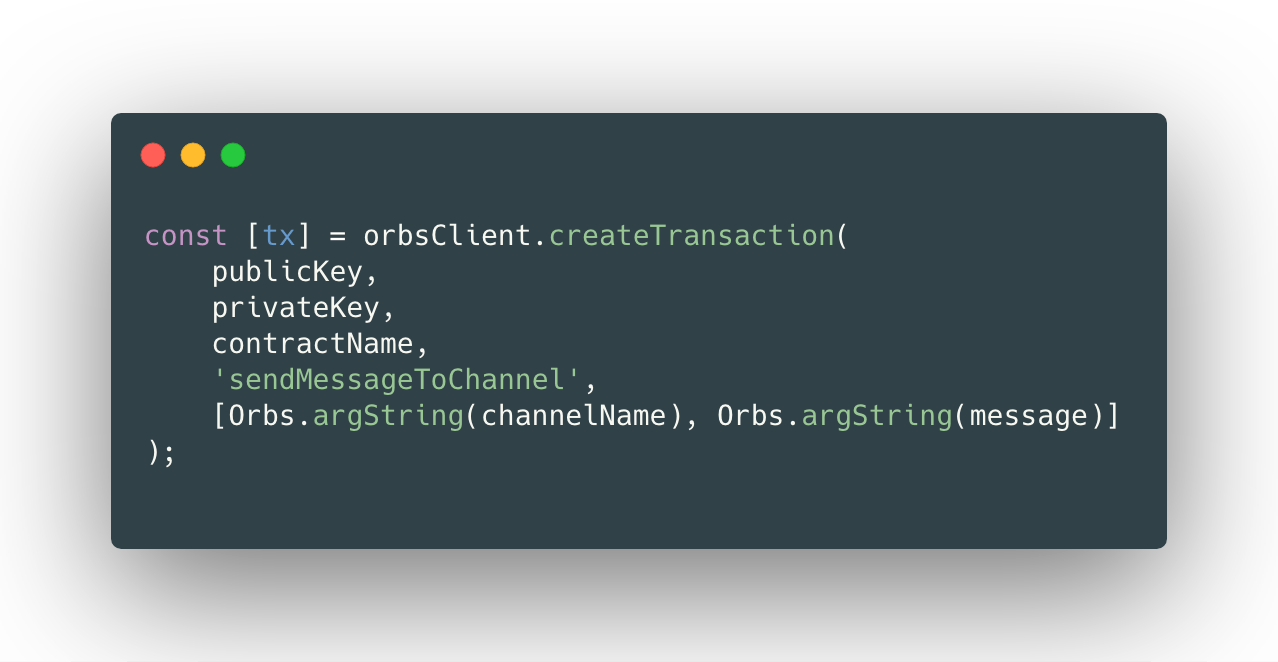
Transaction is like a write-to database, which is why we also need to pass our public and private key in order to sign the transaction. We specify the contract by its name and the method that we want to invoke (sendMessageToChannel in our case). Lastly, we pass the array of arguments that will be passed to the specified method during invocation.
Since the contract is implemented in Go language and it has different types from JavaScript, orbs-client-sdk provides utility function (e.g. argString) to normalize types between different languages.
With the transaction object in our hands, we can actually send it:
const response = await orbsClient.sendTransaction(tx);
At the end we can verify the response by reading transaction status and execution result. If the values are “COMMITTED” and “SUCCESS”, then out transaction has been executed successfully.
In the previous part, we’ve been able to send the message. Now let’s try to display them in a live manner. We will start with just fetching the first batch, say, first 50 messages. Then we will improve the solution by using pagination and polling for live updates.
Similar to sending a message, we start with creating a query. It’s different from transaction, because we are doing a read action and it doesn’t require the consensus between nodes. Therefore it’s much faster:
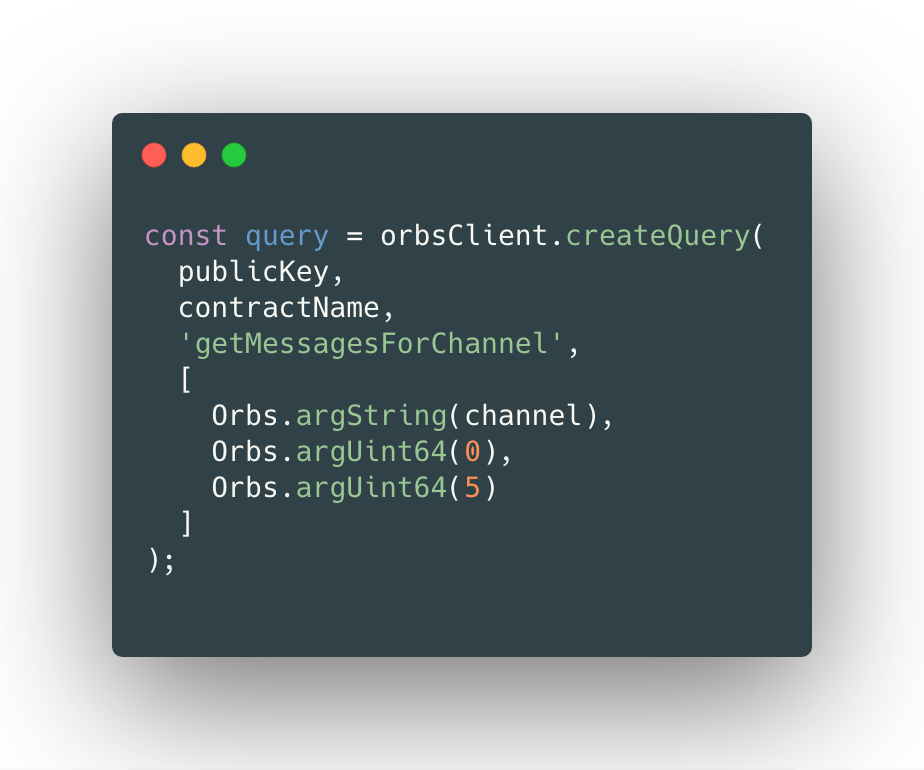
In order to create a query, we are calling the corresponding method of the orbs client and passing our public key, contract name and the method that we would like to invoke on the specified contract. Lastly, we pass the array of arguments, very similar to what we’ve seen in createTransaction. In our case we specify the channel name and range of messages, say we want to get the first 5 messages.
When we send the query, we should expect the array of messages in return in JSON format.
We have the Messages component whose purpose is to render the list of messages. As soon as get a response from our query and update the state of the App component, messages will be rendered on the page.
There are two flaws with our current implementation - when a user sends a new message, we need to refresh the page in order to see it; when we have more than 5 messages, we won’t see them too. We can solve it with pagination and polling mechanism.
Pagination, in a nutshell, is a mechanism of fetching only chunks of data instead of fetching all at once for a better performance.
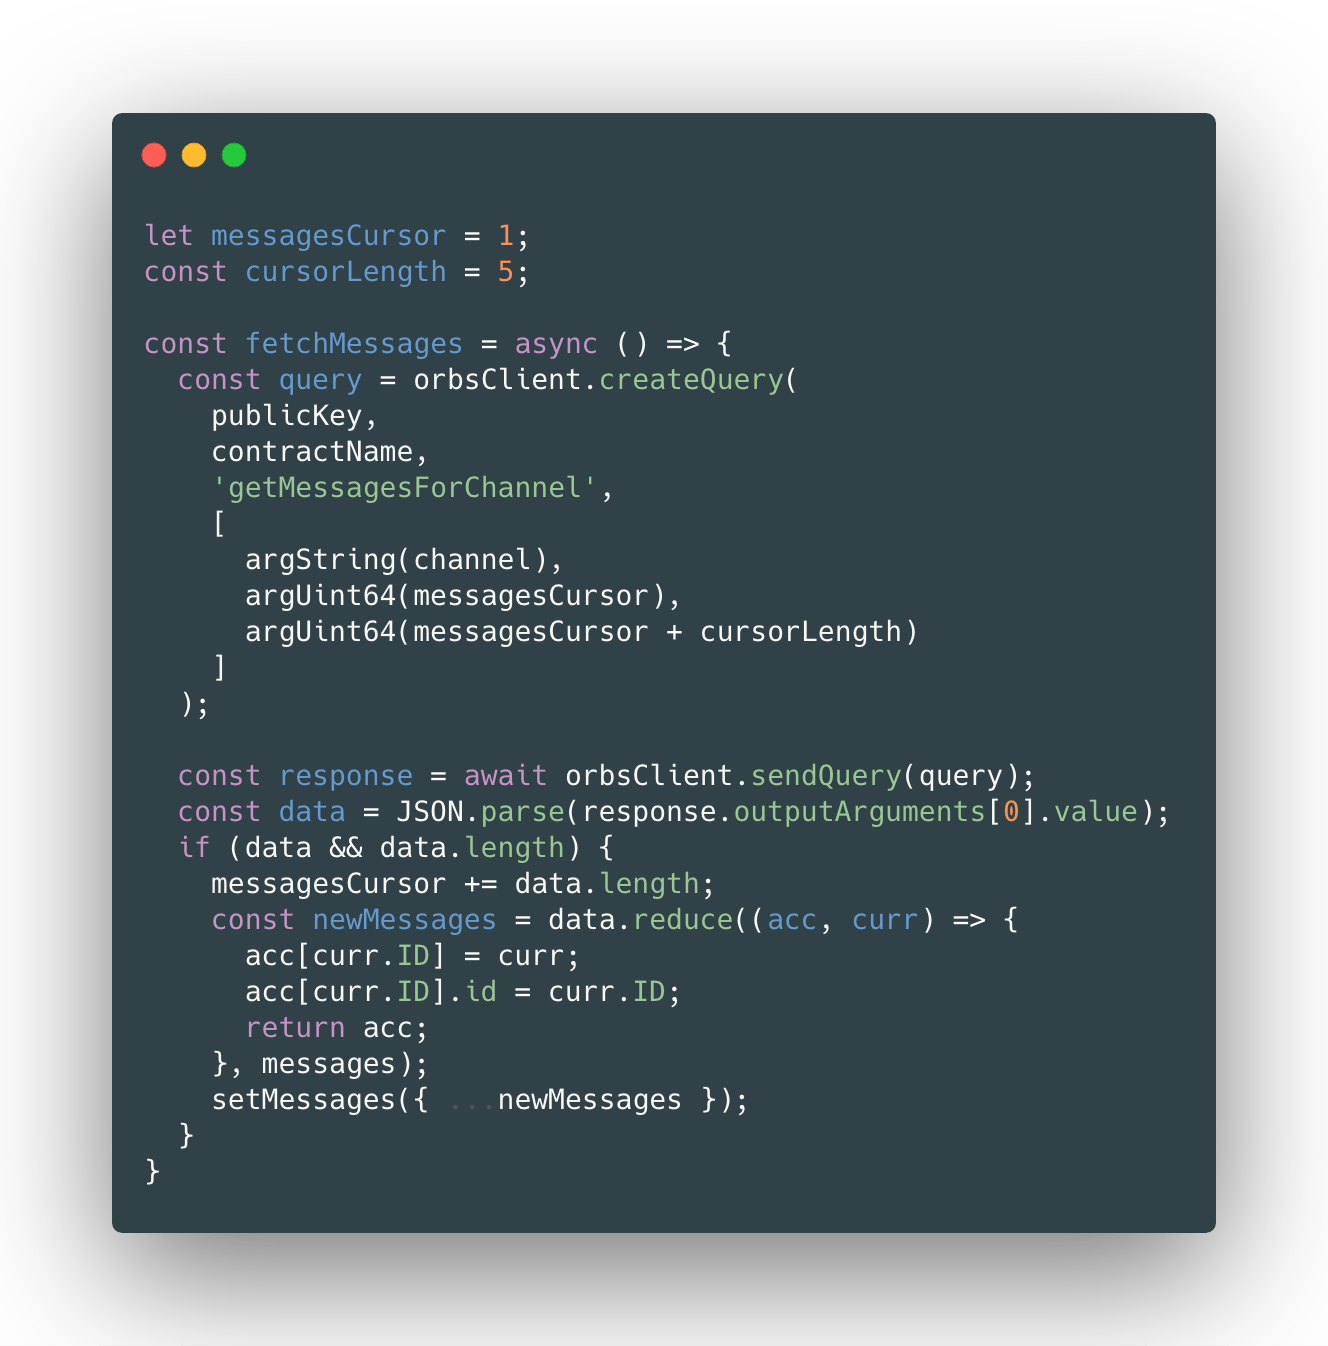
The method ‘getMessageForChannel’ supports from and to arguments that allows us to specify the chunk of messages that we want. We start with the first message, and going to fetch 5 messages every time.
As soon as we get a response, we update the value of the message cursor with the amount of messages received and append new messages to the ones that we loaded previously:
Now let’s address the problem with live updates. There are 3 possible solutions in the front-end world to this problem: polling, long-polling and web sockets. We will use the simplest of them - polling.
It means we will call our fetchMessages function at a constant rate to query the contract:
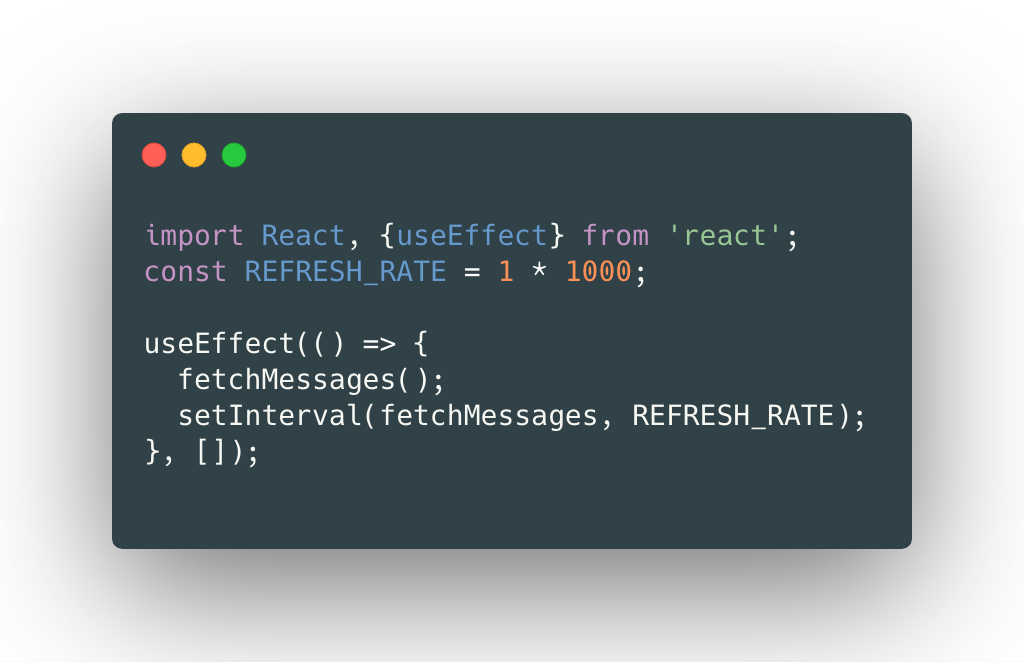
During the mount of our application, we firstly call fetchMessage to get the first batch and then we call setInterval. JavaScript event loop will invoke our fetch function at the given refresh rate. Thus, every 2 seconds we fetch a new batch and if it contains new messages, our state will be updated and messages are rendered.
Our application is ready. It’s time to deploy it and see it live in production. Create-react-app supports the generation of a static website and deploying it to github pages. Follow this guide to enable it for your application.
You can see the Conversation application running live here.
In these two parts (Part I) we’ve discussed how to build a simple decentralized application end-to-end using Orbs platform. The full working code is available in this GitHub repository. Feel free to fork and improve it.
···
Sergey (@bolshchikov) is a passionate software engineer and manager who loves to solve complex problems. He previously worked as an engineering manager and developer at Wix.com and co-founded the biggest front-end conference in the Middle East - "YouGottaLoveFrontend". Sergey holds an MSc in Industrial Engineering from the Technion.
···
We use cookies to ensure that we give you the best experience on our website. By continuing to use our site, you accept our cookie policy.